

About the Holiday
Today is a day when we can show our museum curators and representatives in government how much we value museums. Without these grand (and sometimes small) buildings dedicated to preserving and teaching about our historical, scientific, and cultural achievements, our lives would be much poorer. Show your support for museum funding by visiting and/or donating to your favorite museum!
Another wonderful way to celebrate our custodians of history, science, art, and life is by reading the clever How the Dinosaur Got to the Museum / How the Sphinx Got to the Museum / How the Meteorite Got to the Museum series by author-illustrator Jessie Hartland.
How the Dinosaur Got to the Museum
By Jessie Hartland
“So…” asks a little boy visiting the Smithsonian Museum of Natural History, “how did the dinosaur get to the museum?” Thus begins the tale—not of the dinosaur’s life, but of its journey from life to the museum exhibit hall.

Image and text copyright Jesse Harland, courtesy of Blue Apple Books
One hundred and forty-five million years ago, the dinosaur roamed the plains of what is now Utah, Overcome by weather and evolutionary events, the dino is buried and much, much later once again exposed. A Dinosaur Hunter finds one large bone and believes it to be from a Diplodocus Longus. He calls in the Paleontologist who confirms it. A team of Excavators arrives and unearths the rest of the skeleton.
The Movers pack the skeleton which was found by the Dinosaur Hunter, confirmed by the Paleontologist, and dug up by the Excavators and load it on a train that transports it to the Smithsonian. Here, the bones are cleaned and preserved by the Preparators, who discover that the head and neck are missing!
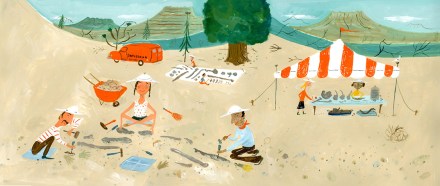
Image copyright Jesse Harland, courtesy of Blue Apple Books
The Curator locates a plaster cast at another museum and work continues. The Diplodocus is assembled, but in the darkness the Night Watchman trips over its tail and breaks it! In come the Welders to fix it, and finally the Riggers can display the skeleton.
The Exhibits Team creates a background, lighting, and signs for Diplodocus, and the Cleaners give it a final dusting before the Director invites the public to view the magnificent exhibit with a speech and a toast.

Image copyright Jesse Harland, courtesy of Blue Apple Books
Jessie Hartland’s bold, colorful illustrations offer a child’s-view perspective on the behind-the-scenes working of a museum, while her highly entertaining and educational text will keep kids giggling and reciting along as each page builds on the next to reveal the story of the men, women, and processes engaged in creating a museum exhibit.
Ages 5 – 9
Blue Apple Books, New Jersey, 2011 | ISBN 978-1609050900
Museum Advocacy Day Activity

Create a Museum Exhibit
Every item has a story. Is there a funny anecdote behind that knick-knack on the shelf? Does your favorite serving dish hold sentimental value? A fun and educational way for kids to learn family stories and interact with their own history is to create a museum exhibit of objects in your home.
For teachers this can be a fun classroom activity that incorporates writing, art, and speaking, and categorizing skills. Students can use objects in the classroom or bring items from home to set up museum exhibits. This activity can be done as a whole-class project or by smaller groups, who then present their exhibit to the rest of the class.
Supplies
- A number of household or classroom items
- Paper or index cards
- Markers
- A table, shelf, or other area for display
Directions
- To get started have children gather a number of items from around the house to be the subjects of their exhibit. An exhibit can have a theme, such as Grandma’s China or Travel Souvenirs, or it can contain random items of your child’s choice, such as toys, plants, tools, even the furniture they see and use every day.
- Using the paper or cards and markers, children can create labels for their exhibit items. Older children will be able to write the labels themselves; younger children may need adult help.
- Spend a little time relating the story behind each object: where it came from, how long you’ve had it, when and how it was used in the past, and include any funny or touching memories attached to the item. Or let your child’s imagination run free, and let them create histories for the objects.
- When the labels are finished, arrange the items on a table, shelf, or in a room, and let your child lead family members or classmates on a tour. You can even share the exhibit with family and friends on social media.
- If extended family members live in your area, this is a wonderful way for your child to interact with them and learn about their heritage.

